Pan Fixtures
Improving production efficiency.
A set of fixtures that assist in the manual drilling and assembly of pans, resulting in reduced lead times.
July 2024
Designed during internship with Raven Labs


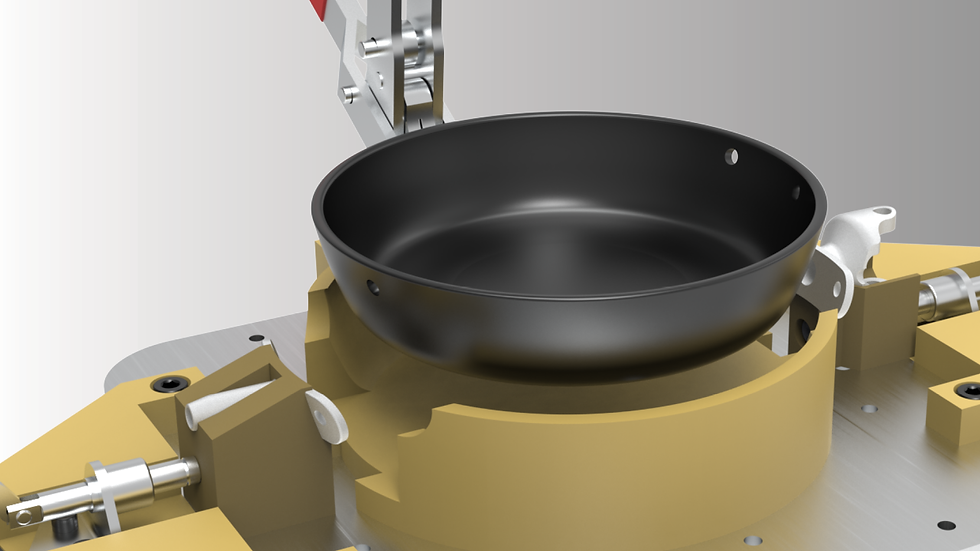
Fixure 1: Angled-drilling.
Using

Angled-Drilling Fixture.
The fixture allows for the precise drilling of holes that consistently and accurately align with the clasps.
1. Open position
The fixture is in a disengaged positon, clamps are raised and ready for the next pan.


2. Secured Position
Once the pan is placed on the mount, the toggle clamps are engaged and secured.
3. Drilling
The drill bit is passed through the drill bushing and contacts the pan and the exact angle required for mounting the clasps.

Fixture 2:
Clasp Installation
Using

Supported Clasp Installation.
The fixture allows for the rapid and efficient installation of the clasps onto the pan, the final step in the production process.
1. Stand-by position
The fixture is in a disengaged positon, clamps are raised and ready for the next pan.


2. Securing Y-Clasp
The Y-clasp is inserted into its bracket, which is specifically designed for the clasp's curvature to allow for a secure fit.
3. Securing C-Clasp
Similarly, the C-Clasp is placed into its bracket, specifically designed to securely hold the clasp based on its shape.


4. Placing pan
The pan is placed into the mount.
5. Securing clamps
Finally, all three clamps are secured and the rivets can be installed using the rivet gun.
